Amigurumi Turtle Pattern: Domed Shell, Flat Belly and Four Flippers
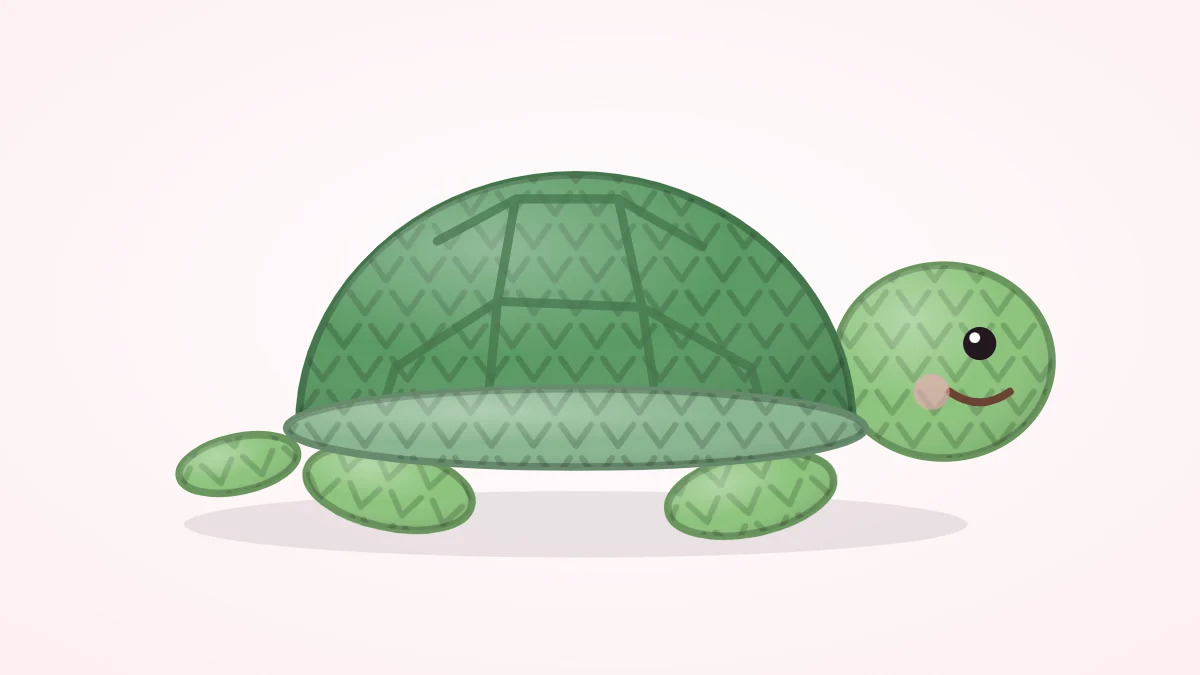
A turtle built from a domed shell with a back-loop ridge and a flat belly disc, plus a round head, four flippers and a tiny tail, with guidance on joining and stuffing a flat-bottomed shape.
Tutorial at a glance
Materials
- Green worsted weight yarn for the shell
- Lighter green or tan yarn for belly, head, flippers and tail
- Two 6 mm safety eyes or black yarn
- Polyester fiberfill
- Locking stitch marker
- Blunt yarn needle and pins
A turtle has to do something a ball never does: sit flat. This amigurumi turtle pattern solves that with two pieces instead of one, a domed shell and a flat belly disc that meet edge to edge at 30 stitches, and a single back-loop round that turns the shell rim into a crisp ridge. The finished turtle is designed to be about 4.5 in (11 cm) from nose to tail, depending on yarn and tension.
The stitches are all basic. It is rated intermediate because of the back-loop round, the two-piece join and the care needed to stuff a shape with a flat bottom.
Materials
- Worsted weight (#4 medium) cotton or acrylic yarn in green for the shell
- The same weight in a lighter green or tan for the belly, head, flippers and tail
- 3.5 mm (US E-4) hook
- Two 6 mm safety eyes, or black yarn to embroider them
- Polyester fiberfill, a locking stitch marker, a blunt yarn needle and pins
Safety eyes are a choking hazard for babies and children under 3; embroidered eyes are the safe choice for a young child.
Abbreviations
- MR: magic ring
- st(s): stitch(es)
- sc: single crochet
- inc: increase, 2 sc in the same stitch
- dec: invisible decrease, sc 2 stitches together through the front loops
- BLO: back loop only
- Rnd: round
- FO: fasten off
Work in a continuous spiral, right side out, with a stitch marker in the first stitch of each round.
Shell and belly
The shell increases to 36 stitches, runs even for the dome wall, then works one round into the back loops only. The unused front loops stay on the outside as a raised line, and the fabric folds sharply inward at that point. The next round decreases to 30, tucking the rim under so it meets the belly.
Shell (make 1, green)
- Rnd 1: 6 sc in MR (6)
- Rnd 2: inc x 6 (12)
- Rnd 3: (sc 1, inc) x 6 (18)
- Rnd 4: (sc 2, inc) x 6 (24)
- Rnd 5: (sc 3, inc) x 6 (30)
- Rnd 6: (sc 4, inc) x 6 (36)
- Rnds 7-10: sc 36 (36)
- Rnd 11: in BLO, sc 36 (36)
- Rnd 12: (sc 4, dec) x 6 (30)
- Work Rnd 12 through both loops again. FO with a long tail, about four times the distance around the rim.
Belly (make 1, light color)
- Rnd 1: 6 sc in MR (6)
- Rnd 2: inc x 6 (12)
- Rnd 3: (sc 1, inc) x 6 (18)
- Rnd 4: (sc 2, inc) x 6 (24)
- Rnd 5: (sc 3, inc) x 6 (30)
- FO and weave in the end. The disc should lie flat.
Tip
If the belly disc ripples, the stitches are loose for the yarn; if it cups into a bowl, they are tight. Either way, remake it with a relaxed, even tension, because a flat base depends on this piece.
Head, flippers and tail
Head (make 1, light color)
- Rnd 1: 6 sc in MR (6)
- Rnd 2: inc x 6 (12)
- Rnd 3: (sc 1, inc) x 6 (18)
- Rnds 4-7: sc 18 (18)
- Insert the safety eyes between Rnds 4 and 5, with 5 stitches between them.
- Rnd 8: (sc 1, dec) x 6 (12)
- Rnd 9: sc 12 (12)
- Stuff firmly. FO with a long tail.
Flippers (make 4, light color)
- Rnd 1: 6 sc in MR (6)
- Rnd 2: (sc 1, inc) x 3 (9)
- Rnds 3-5: sc 9 (9)
- Rnd 6: (sc 1, dec) x 3 (6)
- Do not stuff. FO with a long tail and press flat into a paddle.
Tail (make 1, light color)
- Rnd 1: 4 sc in MR (4)
- Rnd 2: (sc 1, inc) x 2 (6)
- Rnd 3: sc 6 (6)
- Do not stuff. FO with a long tail.
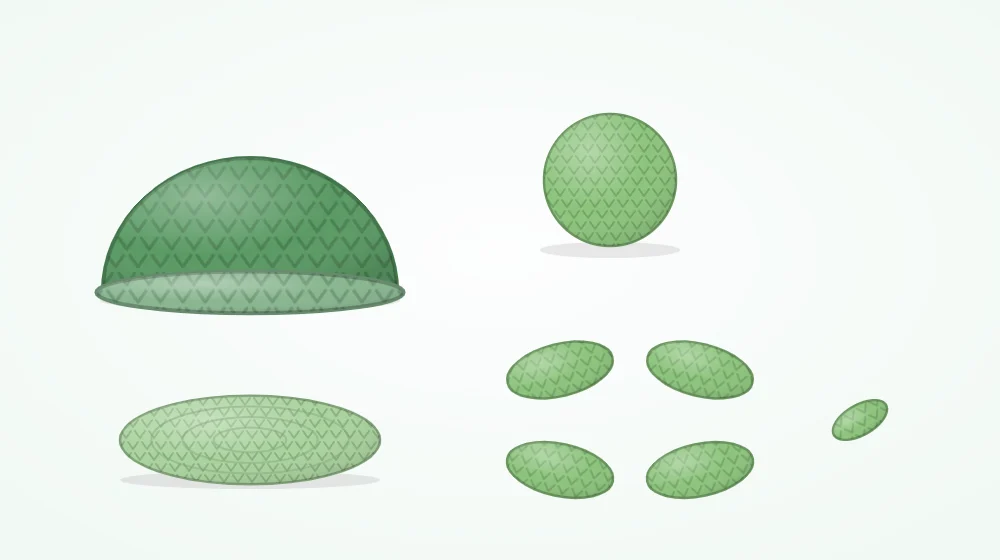
Joining the shell to the belly
- Hold the belly against the shell opening with both right sides facing out. Pin at four points, like the quarters of a clock, so the disc cannot shift.
- Thread the shell’s long tail. Whip stitch the two edges together, passing the needle under both loops of one belly stitch and both loops of the matching shell stitch.
- Sew about two-thirds of the way around, 20 stitches, and stop to stuff.
- Finish stuffing through the gap, then sew the remaining 10 stitches and hide the tail inside.
The whip stitch and other seams are explained in how to sew amigurumi pieces together.
Stuffing a flat-bottomed shape
Fiberfill pushes outward in every direction, so a shell stuffed like a ball becomes a ball and the turtle rocks. The aim is a full dome over a flat base.
- Pack the top of the dome first, pushing small pieces up into the crown.
- Fill outward to the ridge so the wall of the shell does not dent.
- Stop while the belly still lies flat when the turtle is pressed onto a table. If the disc bulges, take a pinch out.
- After closing, press the turtle down and smooth the dome between your palms to settle the filling.
Watch out
Check that the ridge runs level all the way around before the last stitches go in. A ridge that dips on one side means the belly was sewn on off-center, and it is far easier to unpick now than after the flippers are attached.
More detail on filling awkward shapes is in how to stuff amigurumi.
Attaching head, flippers and tail
- Head. Pin the open 12-stitch end to the front of the shell so the seam between shell and belly passes behind the middle of the opening. Tilt the face slightly upward and sew all the way around.
- Front flippers. Sew the narrow end of two flippers to the seam, about 3 stitches to each side of the head, angled forward.
- Back flippers. Sew the other two to the seam toward the rear, angled back.
- Tail. Sew the open end to the seam at the center back, opposite the head.
Finish with a small embroidered smile on the front of the head, between Rnds 2 and 3. This amigurumi turtle pattern leaves the shell plain; for a patterned shell, embroider a few straight lines radiating from Rnd 1 down to the ridge in the lighter yarn.
The back-loop round used here is one of several ways to make sharp edges and flat bases, covered in amigurumi shaping. A dome like this shell is also described in basic amigurumi shapes.
Frequently asked questions
What can be done with the front loops left over from the back-loop round?
They can be left as they are, as a neat raised line. For a bolder rim, join yarn to any free loop and work one round of slip stitch or single crochet into those loops, which adds a small lip around the shell.
Can the shell and belly be crocheted together instead of sewn?
Yes. Hold the two edges together with the shell facing you and work one round of single crochet through both layers, stuffing before the gap closes. This leaves a visible outer ridge at the seam, which some people like as part of the shell.
Why does the turtle head droop?
The head is sewn only along its top edge or the neck end is under-stuffed. Sew the full circle of the opening to the shell and belly, and pack fiberfill right up to the open end before closing the last few stitches.