Amigurumi Dog Pattern: A Puppy With Floppy Ears and an Eye Patch
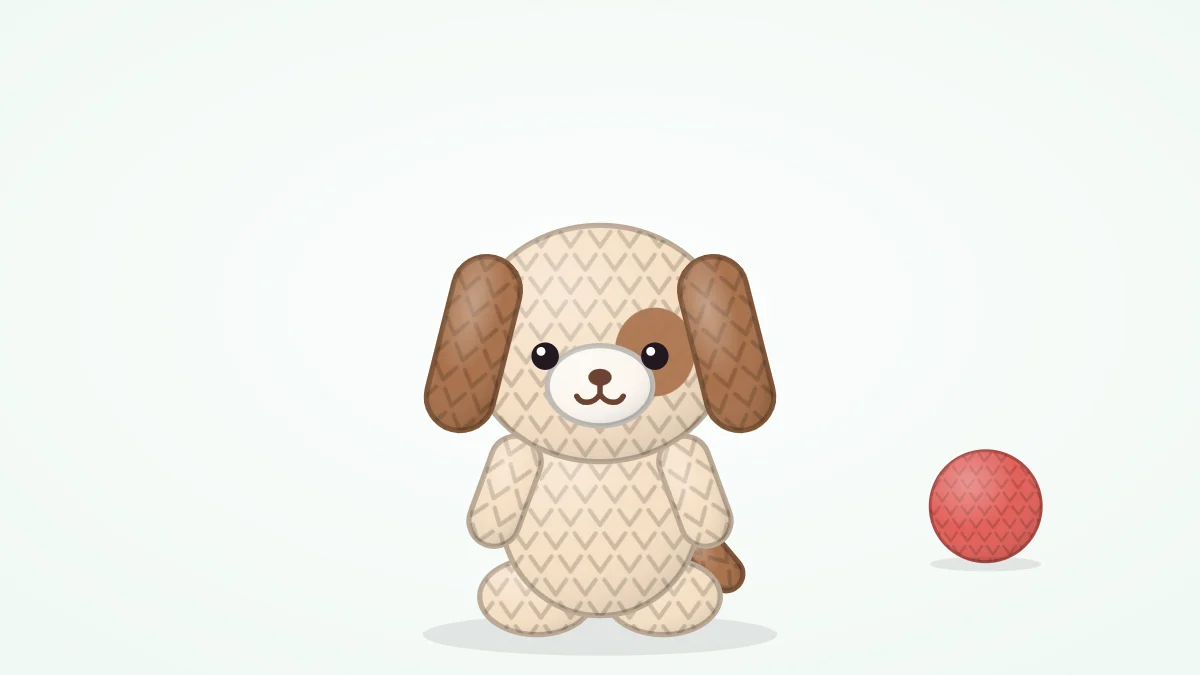
A seated puppy with a separate oval muzzle, floppy ears worked flat, a one-eye patch in a second color and a short tail, with notes on how ear placement changes the breed feel.
Tutorial at a glance
Materials
- Cream worsted weight yarn (main color)
- Brown worsted weight yarn for ears and patch
- Two 6 mm safety eyes or black yarn
- Black yarn for the nose
- Polyester fiberfill
- Locking stitch marker
- Blunt yarn needle and pins
Move a pair of floppy ears one round up or down a head and the puppy changes character completely. That is the idea behind this amigurumi dog pattern: a plain round head and seated body, with a separate oval muzzle, flat folded ears, a one-eye patch and a stub tail doing the work of making it a dog. The puppy is designed to sit about 4.5 in (11 cm) tall, depending on yarn and tension.
It is an intermediate project: the muzzle starts from a chain, the ears are worked flat in rows, and the patch uses a second color.
Materials
- Worsted weight (#4 medium) cotton or acrylic yarn in cream (main color)
- The same weight in brown for the ears and eye patch
- 3.5 mm (US E-4) hook
- Two 6 mm safety eyes, or black yarn to embroider them
- Black yarn for the nose
- Polyester fiberfill, a locking stitch marker, a blunt yarn needle and pins
Safety eyes are a choking hazard for babies and children under 3. Embroidered eyes are the safe choice for a young child.
Abbreviations
- MR: magic ring
- ch: chain
- st(s): stitch(es)
- sc: single crochet
- inc: increase, 2 sc in the same stitch
- dec: invisible decrease, sc 2 stitches together through the front loops
- sl st: slip stitch
- Rnd: round
- FO: fasten off
Unless a piece says otherwise, work in a continuous spiral, right side out, with a stitch marker in the first stitch of each round.
Head, body and legs
Head (make 1, cream)
- Rnd 1: 6 sc in MR (6)
- Rnd 2: inc x 6 (12)
- Rnd 3: (sc 1, inc) x 6 (18)
- Rnd 4: (sc 2, inc) x 6 (24)
- Rnd 5: (sc 3, inc) x 6 (30)
- Rnds 6-11: sc 30 (30)
- Do not add the eyes yet; one of them goes through the patch.
- Rnd 12: (sc 3, dec) x 6 (24)
- Rnd 13: (sc 2, dec) x 6 (18)
- Leave the working loop on the marker while you make the eye patch and fit the eyes, then stuff firmly and FO with a long tail.
Body (make 1, cream)
- Rnd 1: 6 sc in MR (6)
- Rnd 2: inc x 6 (12)
- Rnd 3: (sc 1, inc) x 6 (18)
- Rnd 4: (sc 2, inc) x 6 (24)
- Rnd 5: (sc 3, inc) x 6 (30)
- Rnds 6-9: sc 30 (30)
- Rnd 10: (sc 3, dec) x 6 (24)
- Rnds 11-12: sc 24 (24)
- Rnd 13: (sc 2, dec) x 6 (18)
- Stuff firmly. FO. The 18-stitch opening matches the head.
Legs (make 4, cream)
- Rnd 1: 6 sc in MR (6)
- Rnd 2: (sc 1, inc) x 3 (9)
- Rnds 3-7: sc 9 (9)
- Stuff lightly. FO with a long tail.
Muzzle, ears, eye patch and tail
Muzzle (make 1, cream)
The muzzle is an oval, worked around both sides of a short chain. The oval start is explained with a diagram in basic amigurumi shapes.
- Ch 5.
- Rnd 1: starting in the 2nd ch from the hook, sc 3, 3 sc in the last ch; turn the work to continue along the other side of the chain, sc 2, 2 sc in the last ch (10)
- Rnd 2: inc, sc 2, inc x 3, sc 2, inc x 2 (16)
- Rnds 3-4: sc 16 (16)
- Sl st in the next st. FO with a long tail.
Ears (make 2, brown)
These are worked flat in rows, turning at the end of each one.
- Ch 5.
- Row 1: sc in the 2nd ch from the hook and in each ch across, ch 1, turn (4)
- Rows 2-9: sc 4, ch 1, turn (4)
- Row 10: dec x 2 (2)
- FO and weave in this end. Leave the starting tail long for sewing. Row 10 is the rounded tip; the chain edge is the top.
Eye patch (make 1, brown)
- Rnd 1: 6 sc in MR (6)
- Rnd 2: inc x 6 (12)
- Sl st in the next st. FO with a long tail. Do not pull the ring fully tight: the eye post passes through it.
Tail (make 1, cream)
- Rnd 1: 4 sc in MR (4)
- Rnd 2: (sc 1, inc) x 2 (6)
- Rnds 3-5: sc 6 (6)
- Do not stuff. FO with a long tail.
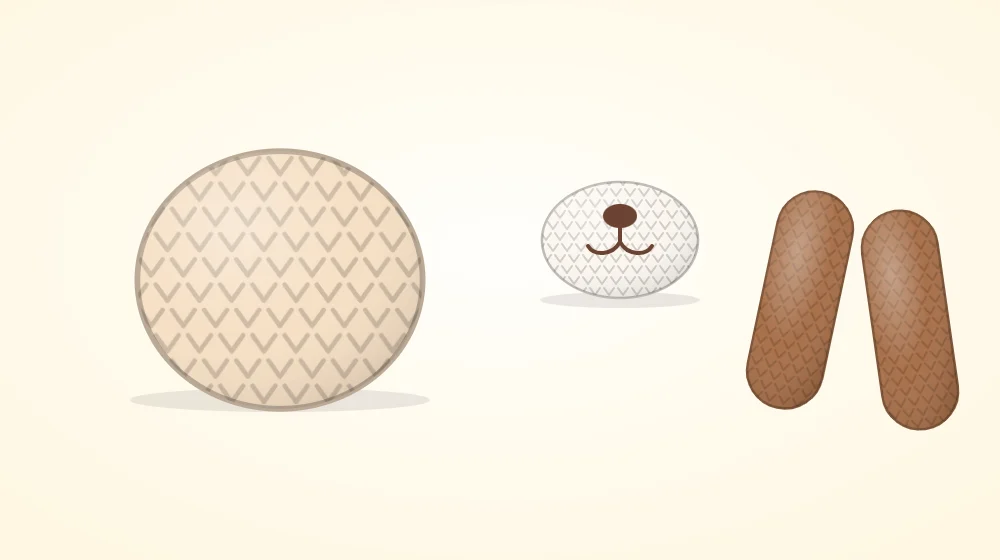
Building the face
- Eyes and patch. Mark both eye positions between Rnds 8 and 9 of the head, with 8 stitches between them. Push one eye post through the center of the patch, then through the head, and fit the washer. Fit the second eye directly into the head.
- Stuff and close. Stuff the head and FO. Sew the patch edge flat to the head with small stitches.
- Nose. With black yarn, work five or six horizontal straight stitches at the top center of the muzzle, then one vertical stitch down from the middle.
- Muzzle. Pin it with its long side horizontal over Rnds 9-12, centered under the eyes. Whip stitch around, adding a little stuffing before the last stitches so it stands out from the face.
Watch out
The patch edge can cup or ripple if the stitches are pulled tight. Pin it at four points first and sew with relaxed tension so it lies flat against the curve of the head.
How ear placement changes the breed
Fold the chain edge of each ear in half and catch the fold with a stitch, which cups the top and makes the ear hang. Then try the positions below with pins before sewing.
| Where the fold is sewn | Effect |
|---|---|
| Side of the head, Rnds 5-6, hanging straight down | Soft, long-eared spaniel or beagle feel |
| High on the crown, Rnds 3-4, tips falling outward | Alert, playful puppy |
| Low on the side, Rnds 7-8, tips below the chin | Droopy, sleepy hound |
The ears in this amigurumi dog pattern are easy to lengthen: add rows before Row 10. Other ear constructions are compared in amigurumi ears.
Final assembly
- Sew the head to the body, matching the two 18-stitch openings and adding stuffing at the neck before closing.
- Sew two legs to the front of the body around Rnds 3-5, pointing forward, as back feet.
- Sew the other two legs under the neck, pointing down, as front legs.
- Sew the tail to the center back at Rnd 3, angled upward.
If seams gape or pieces drift while you sew, see how to sew amigurumi pieces together. A flat muzzle usually means too little stuffing, and amigurumi shaping shows other ways to build a snout.
Frequently asked questions
Why are the dog ears worked flat instead of in the round?
A single layer of fabric is thin and flexible, so it hangs and folds the way a floppy ear should. An ear worked in the round and flattened has two layers and tends to stand out stiffly from the head.
Do the edges of the flat ears need a border?
No, but a border is an option. A round of single crochet worked down one long side, around the tip and up the other side smooths the row ends and makes the ear slightly wider. Without it the edges have a small natural texture.
Can the eye patch be added if the eyes are embroidered?
Yes. Sew the patch flat to the head first, then embroider the eye through the middle of it with two short vertical stitches. Black yarn shows clearly on a brown patch, and a single white stitch beside it adds a highlight.