Amigurumi Frog Pattern: A Round One-Piece Frog With Eye Bumps
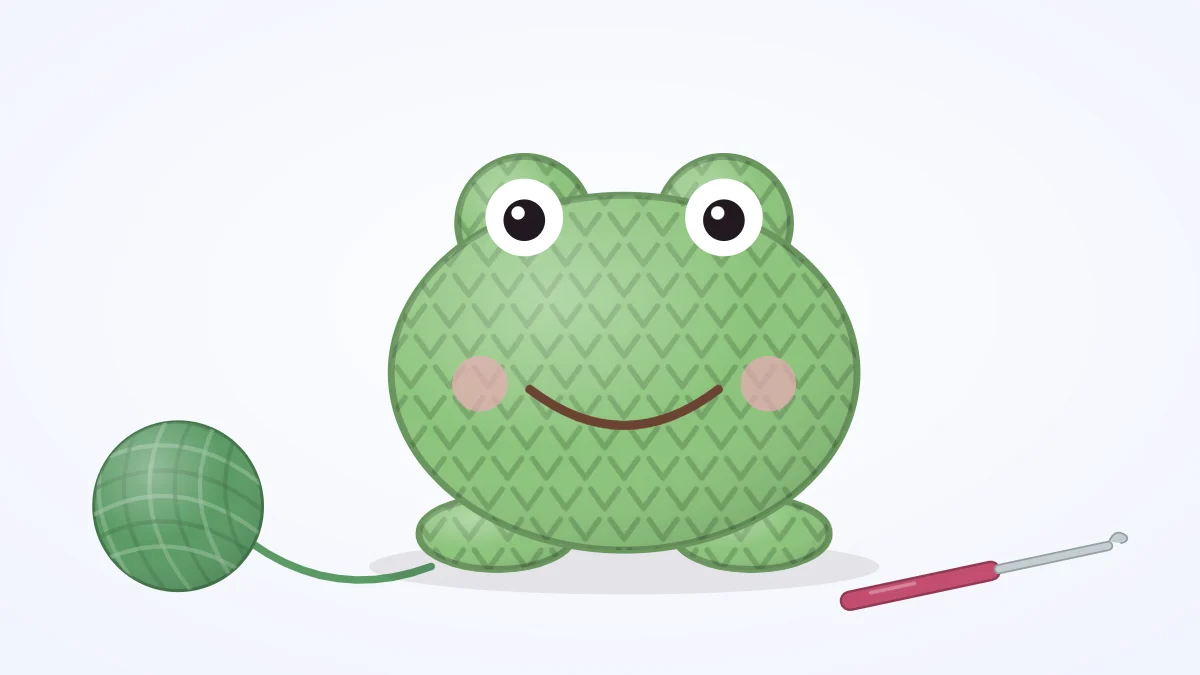
A round frog made from one wide body, two eye bumps and four small feet, with step-by-step help for placing the bumps and embroidering a straight, wide smile.
Tutorial at a glance
Materials
- Green worsted weight yarn
- Two 6-8 mm safety eyes or black yarn
- Dark yarn for the smile
- Pink yarn for the cheeks
- Polyester fiberfill
- Locking stitch marker
- Blunt yarn needle and pins
Most animals need a head sewn to a body. A frog does not: one wide ball is both, and two small domes on top turn it into a frog before the face is even stitched. This amigurumi frog pattern has only three different pieces to crochet and is designed to finish about 3 in (7.5 cm) wide, depending on yarn and tension.
If you have already made the sphere in the amigurumi ball pattern, the body here is the same idea taken one round wider and kept short.
Materials
- Worsted weight (#4 medium) cotton or acrylic yarn in green
- 3.5 mm (US E-4) hook
- Two 6-8 mm safety eyes, or black yarn to embroider them
- Black or dark green yarn for the smile, and pink yarn for the cheeks
- Polyester fiberfill, a locking stitch marker, a blunt yarn needle and pins
Watch out
Safety eyes are a choking hazard for babies and children under 3. For a young child, embroider the eyes onto the bumps with yarn instead.
Abbreviations
- MR: magic ring
- st(s): stitch(es)
- sc: single crochet
- inc: increase, 2 sc in the same stitch
- dec: invisible decrease, sc 2 stitches together through the front loops
- Rnd: round
- FO: fasten off
Work in a continuous spiral, right side out, moving a stitch marker into the first stitch of each round.
Body
The body is worked from the top of the head down, so the closing point ends up hidden underneath. It grows to 42 stitches but has only six even rounds, which makes it wider than it is tall.
Body (make 1)
- Rnd 1: 6 sc in MR (6)
- Rnd 2: inc x 6 (12)
- Rnd 3: (sc 1, inc) x 6 (18)
- Rnd 4: (sc 2, inc) x 6 (24)
- Rnd 5: (sc 3, inc) x 6 (30)
- Rnd 6: (sc 4, inc) x 6 (36)
- Rnd 7: (sc 5, inc) x 6 (42)
- Rnds 8-13: sc 42 (42)
- Rnd 14: (sc 5, dec) x 6 (36)
- Rnd 15: (sc 4, dec) x 6 (30)
- Rnd 16: (sc 3, dec) x 6 (24)
- Stuff firmly, pressing the piece into a wide, slightly flattened ball.
- Rnd 17: (sc 2, dec) x 6 (18)
- Rnd 18: (sc 1, dec) x 6 (12)
- Add the last of the stuffing.
- Rnd 19: dec x 6 (6)
- FO. Thread the tail through the front loops of the last 6 sts, pull closed and hide the end inside.
Fill the body in small pieces and shape it from outside as you go; how to stuff amigurumi explains how to avoid lumps and dents.
Eye bumps and feet
Eye bumps (make 2)
- Rnd 1: 6 sc in MR (6)
- Rnd 2: inc x 6 (12)
- Rnds 3-4: sc 12 (12)
- FO with a long tail. Fit a safety eye between Rnds 2 and 3 of each bump and press the washer on.
Feet (make 4)
- Rnd 1: 6 sc in MR (6)
- Rnd 2: (sc 1, inc) x 3 (9)
- Rnds 3-4: sc 9 (9)
- Do not stuff. FO with a long tail and press flat.
Positioning the eye bumps
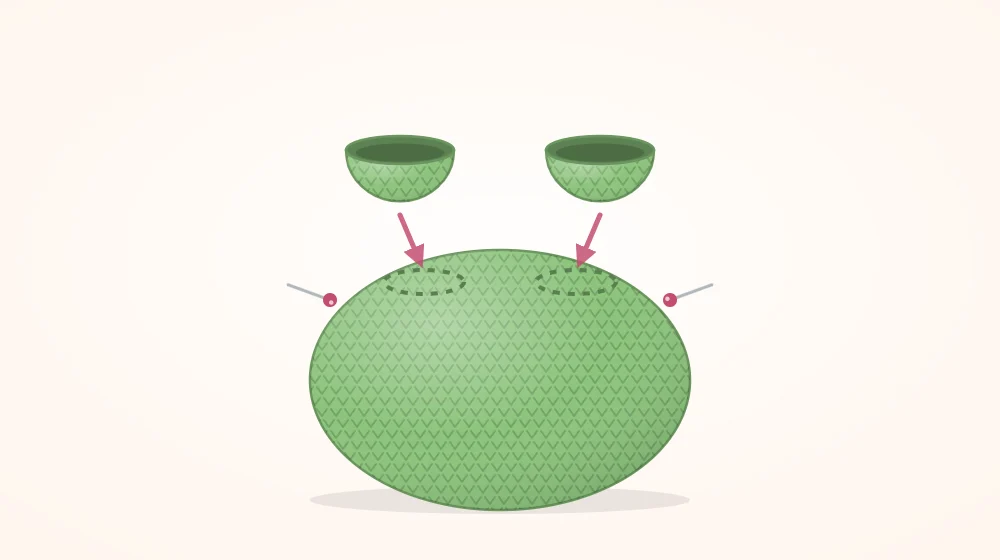
Each bump is a small dome with an open 12-stitch edge. The eye sits on the side of the dome, not on its tip, so that it faces forward once the bump is in place.
- Decide which side of the body is the front. Any side works, but check that the start of the rounds, where the spiral shows a faint seam, is at the back.
- Pin both bumps on the top front of the body, covering Rnds 3-6, with their eyes facing forward. Leave 3 or 4 stitches of body between the two bumps.
- Look from the front, from above and from each side. The bumps should sit at the same height and the same distance from the center of Rnd 1.
- Push a little stuffing into each bump, then whip stitch around the open edge, one stitch of the bump to one stitch of the body.
Tip
Count stitches rather than judging by eye. If the left bump starts 2 stitches from the center line, the right one should start 2 stitches from it too.
A straight mouth across the stitches
A wide smile shows every wobble, and the usual cause is a line that drifts from one round to the next. The grooves between rounds give a ready-made ruler.
- Find the groove between Rnds 10 and 11 on the front of the body.
- Mark the mouth corners with two pins in that groove, about 12 stitches apart and centered under the eye bumps.
- Thread dark yarn, enter from the back of the body, and come out at the left pin. Pull the tail end just inside the fabric.
- Backstitch along the groove, one stitch of the fabric at a time, to the right pin. Short stitches follow the curve of the body; one long stitch would lift off the surface.
- For a smile, finish each corner with a single stitch slanting up to the round above.
- Take the needle out through the back, knot close to the fabric and pull the knot inside.
Because amigurumi is worked in a spiral, a groove climbs by one round over a full turn. Across 12 stitches the rise is too small to notice, but it is the reason a mouth that wraps far around the sides starts to look tilted.
Add cheeks with pink yarn: two or three short horizontal stitches below each end of the mouth, one round down. Other mouth and cheek styles are in amigurumi face embroidery.
Attaching the feet
The feet are the last step of this amigurumi frog pattern. Turn the frog over. Sew the open end of two feet under the front edge, around Rnds 15-16, about 8 stitches apart, with the rounded ends poking forward. Sew the other two a little wider apart toward the back, angled outward. Only the tips should show from above.
Stand the frog on a table before fastening off the last foot. If it rocks, the feet are not level, and the bottom can be pressed flatter by hand. General sewing help is in how to sew amigurumi pieces together.
Frequently asked questions
Can the frog's eye bumps be a different color?
Yes. White bumps with dark safety eyes give a wide-eyed cartoon look, while green bumps blend into the body for a softer shape. If you use white, sew with the white tail so the stitches disappear into the bump.
Why is the frog body closed at the bottom instead of the top?
The closing rounds are never quite as smooth as the starting ring. Working from the top down puts the neat magic ring between the eye bumps, where it is seen, and the closed end underneath, where the feet cover it.
How can the frog be given longer legs?
Add even rounds of 9 stitches to the feet until they are the length you want, and leave them unstuffed so they bend. Sew the back pair to the sides of the body and fold them forward to suggest a crouching pose.