Amigurumi Ears: Round, Long, Pointed and Floppy Patterns for Any Animal
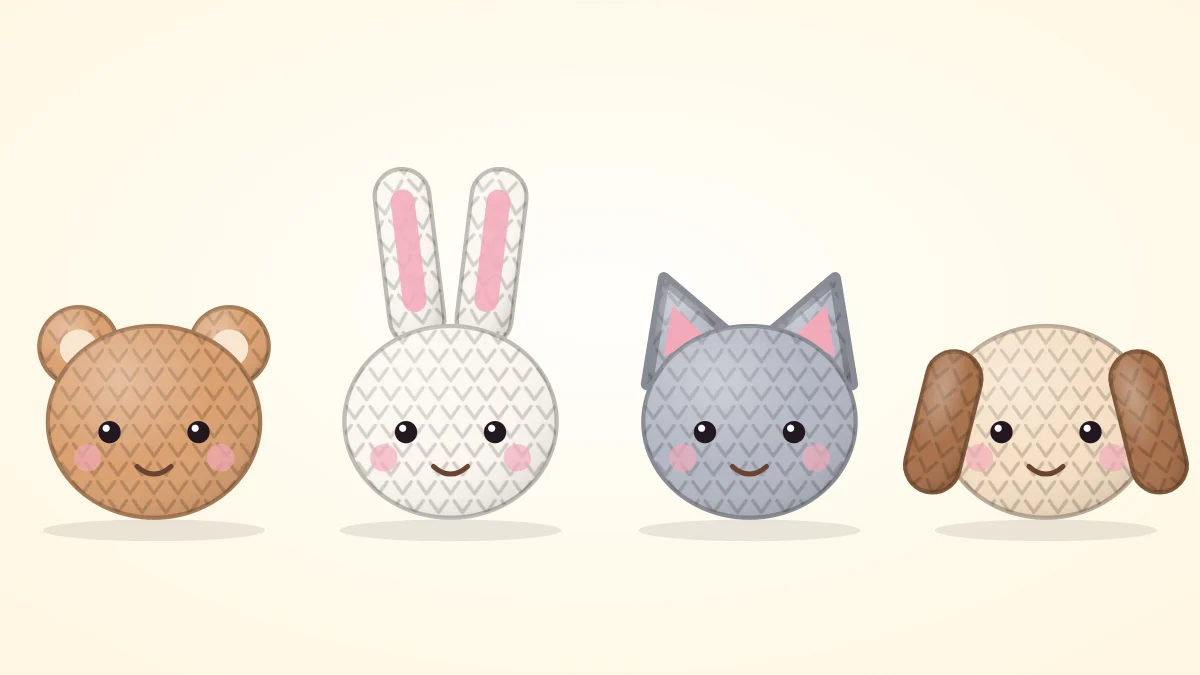
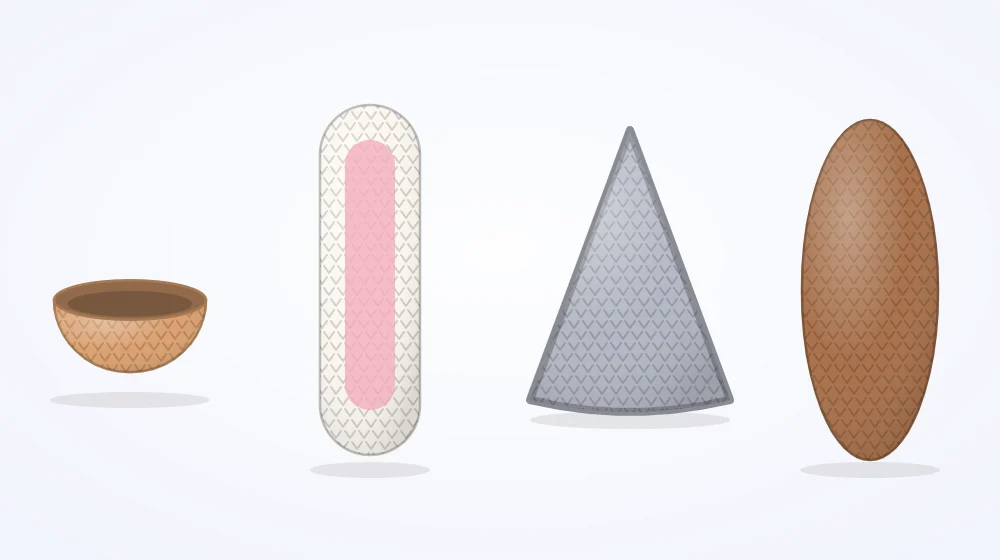
Four short ear patterns (round cup, long, pointed and floppy) and where each one sits on the head, so the same plain ball can become a bear, bunny, cat or dog.
Tutorial at a glance
Materials
- Worsted weight yarn matching the head
- 3.5 mm (US E-4) hook
- Locking stitch marker
- Blunt yarn needle
- Pins for positioning
Take one plain crocheted ball with two eyes and ask what animal it is. There is no answer until the ears go on. Round cups make it a bear, tall tubes a bunny, triangles a cat, hanging flaps a dog. On any animal, amigurumi ears are small, quick pieces, but they carry most of the identity of a toy, and where they sit matters as much as their shape.
This guide to amigurumi ears gives one short pattern for each of the four basic types, sized for a 30-stitch head worked from the crown down, such as the head in the amigurumi bear pattern. Round numbers below refer to that head, with Rnd 1 at the very top.
What you need
Use the same yarn and hook as the head: by default worsted weight (#4 medium) cotton or acrylic with a 3.5 mm (US E-4) hook. You also need a locking stitch marker, a blunt yarn needle and pins. None of these ears is stuffed.
Abbreviations used in the patterns:
- MR: magic ring
- st(s): stitch(es)
- sc: single crochet
- inc: increase, 2 sc in the same stitch
- dec: invisible decrease, sc 2 stitches together through the front loops
- Rnd: round
- FO: fasten off
Each ear is worked in a continuous spiral, right side out, with the marker in the first stitch of each round. Make two of each and count the rounds on both, since a one-round difference is easy to see on a finished face.
Four ear types at a glance
| Ear type | Animals | Shape before sewing | Position on a 30-stitch head |
|---|---|---|---|
| Round cup | Bear, mouse, monkey | Shallow cup, pressed flat | Upper sides, Rnds 4-8 |
| Long | Bunny, donkey | Long flattened tube | Top of the head, Rnds 2-4, close together |
| Pointed | Cat, fox | Flattened cone, a triangle | Upper sides, Rnds 3-8, tilted outward |
| Floppy | Dog, lamb, elephant | Long flattened oval | Sides, Rnds 5-6, hanging down |
Round cup ears (bear, mouse)
A round ear is the top third of a ball. Two increase rounds form the curve and two even rounds give it depth.
Round ear (make 2)
- Rnd 1: 6 sc in MR (6)
- Rnd 2: inc x 6 (12)
- Rnds 3-4: sc 12 (12)
- FO with a long tail. Press flat.
Sew the flattened edge to the head in a slight curve, like a shallow letter C opening toward the front. That curve is what makes the ear cup forward instead of lying like a coin. For a mouse, add a round of (sc 1, inc) x 6 after Rnd 2 to reach 18 stitches, work the even rounds on 18, and set the ears lower and wider, around Rnds 5-9.
Long ears (bunny)
Long ears widen slowly, run even, then narrow at the base so they do not cover the whole crown.
Long ear (make 2)
- Rnd 1: 6 sc in MR (6)
- Rnd 2: (sc 1, inc) x 3 (9)
- Rnd 3: (sc 2, inc) x 3 (12)
- Rnds 4-11: sc 12 (12)
- Rnd 12: (sc 2, dec) x 3 (9)
- Rnd 13: sc 9 (9)
- FO with a long tail. Press flat.
Fold the base in half lengthwise and catch it with one stitch before sewing. The pinch gives the ear a channel down the front and helps it stand. Sew the ears near the top, only 2 or 3 stitches apart, for an upright bunny; sew them at Rnds 5-6 pointing sideways for a lop ear. A full rabbit built around ears like these is in the amigurumi bunny pattern.
Pointed ears (cat, fox)
A pointed ear is a cone. Starting with four stitches and adding only two per round keeps the tip sharp.
Pointed ear (make 2)
- Rnd 1: 4 sc in MR (4)
- Rnd 2: (sc 1, inc) x 2 (6)
- Rnd 3: sc 6 (6)
- Rnd 4: (sc 2, inc) x 2 (8)
- Rnd 5: (sc 3, inc) x 2 (10)
- Rnd 6: (sc 4, inc) x 2 (12)
- FO with a long tail. Press flat so the two increase lines form the side edges of the triangle.
For a cat, leave about 6 stitches of crown between the inner corners and tilt the outer corners down the side of the head. For a fox, set the ears closer and more upright, and work Rnds 1-3 in a darker color for dark tips. The amigurumi cat pattern uses a shorter version of this cone on a wider head.
Watch out
Pointed ears placed upright and close together read as horns. If the head starts to look like a little devil, move each ear one or two stitches outward and lean it away from the center.
Floppy ears (dog)
This ear is widest near the tip and narrow at the top, so its weight hangs below the seam.
Floppy ear (make 2)
- Rnd 1: 6 sc in MR (6)
- Rnd 2: inc x 6 (12)
- Rnds 3-7: sc 12 (12)
- Rnd 8: (sc 2, dec) x 3 (9)
- Rnds 9-11: sc 9 (9)
- Rnd 12: (sc 1, dec) x 3 (6)
- FO with a long tail. Press flat.
Sew only the narrow top edge to the head, with the ear pointing down, and leave the rest free. If the ear sticks out, put one hidden stitch through its inner layer into the head halfway down. A thinner, single-layer alternative worked flat in rows is used in the amigurumi dog pattern.
Sewing ears on evenly
- Finish the face first, or at least mark the eyes. All amigurumi ears are placed relative to the eyes, not the other way round.
- Find the center line of the head from Rnd 1 down between the eyes, and mark it with a pin.
- Pin both ears, counting the same number of stitches out from the center line on each side.
- Check from the front, the top and the back. Ears that match from the front can still sit at different depths.
- Sew through both layers of the flattened edge with small whip stitches, front side first, then along the back, so the ear cannot hinge.
Tip
Before committing, pin the same pair of ears in two or three different positions and compare. Moving an ear by a single round changes the age and mood of the character.
Seam stitches and hiding the tails are explained in how to sew amigurumi pieces together.
Frequently asked questions
How are ear patterns resized for a bigger or smaller head?
Keep the ear's widest round at roughly a third to half of the head's widest round. For a 36-stitch head, add one more increase round to the ear; for a 24-stitch head, stop the increases one round earlier. Adjust the even rounds until the length looks right when pinned.
Should amigurumi ears be stuffed?
Small ears usually are not. Two layers of dense single crochet pressed flat are firm enough to hold their shape, and stuffing makes ears bulky and heavy. Very large ears on a big toy can take a thin layer of fiberfill to stop them from collapsing.
How is a contrasting inner ear added?
Crochet a smaller flat piece in the second color, using the first one or two rounds of the same ear pattern, and sew it to the front of the finished ear before attaching the ear to the head. A few straight embroidery stitches in the second color give a similar effect with less bulk.