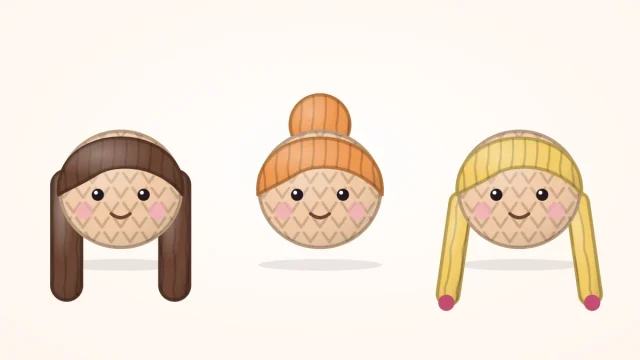
Amigurumi Doll Pattern for Beginners: One-Piece Body
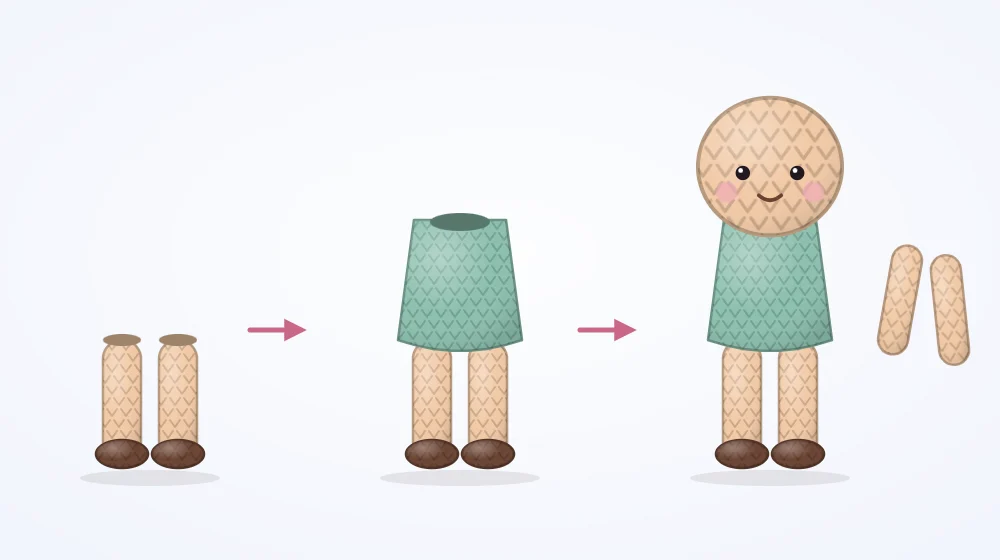
A simple doll worked from the feet up in one piece: joined legs, a dress-colored body, a head continued from the neck, and sewn-on arms and hair cap.

Tutorial at a glance
Materials
- Skin-tone worsted weight yarn
- Dress-color yarn
- Hair-color yarn
- Two 6 mm safety eyes or black yarn
- Polyester fiberfill
- Locking stitch marker
- Blunt yarn needle and pins
Most of the frustration with a first doll comes from sewing: a head that tilts, legs set at different heights, a body that leans. This amigurumi doll pattern for beginners avoids nearly all of it by working the legs, body and head as one continuous piece from the feet up. Only the arms and a simple hair cap are sewn on at the end. It adds two skills to the basics, joining two legs and changing color, and both are explained where they happen.
Materials and Yarn Colors
- Worsted weight (#4 medium) cotton or acrylic yarn in a skin tone, a dress color and a hair color
- 3.5 mm (US E-4) crochet hook
- Two 6 mm safety eyes, or black yarn to embroider them
- Polyester fiberfill
- Locking stitch marker, blunt yarn needle and pins
The doll is about 6.5 in (17 cm) tall, depending on yarn and tension.
Choosing a skin tone: pick a smooth, matte yarn rather than a fuzzy or shiny one, because the face is where uneven stitches show most. Any shade works, from deep brown to pale peach; check it next to the dress and hair colors in daylight, and choose a dress color that contrasts clearly so the neckline reads.
Watch out
Safety eyes are a choking hazard for babies and children under 3. For a young child, embroider the eyes with yarn instead.
Abbreviations
- MR: magic ring
- ch: chain
- st(s): stitch(es)
- sc: single crochet
- inc: increase (2 sc in the same stitch)
- dec: invisible decrease (sc 2 stitches together through the front loops)
- Rnd: round
- FO: fasten off
Work in a continuous spiral, right side out, with a stitch marker in the first stitch of each round.
Legs
Legs (make 2, skin tone)
- Rnd 1: 6 sc in MR (6)
- Rnd 2: (sc 1, inc) x 3 (9)
- Rnds 3-9: sc 9 (9)
- First leg: FO and weave in the end. Second leg: do not FO. On its last stitch, change to the dress color on the final yarn over. Stuff both legs firmly.
Body and Head in One Piece
The first body round travels around both legs and along a short chain between them. If the join is new to you, the guide to amigurumi arms and legs walks through it slowly. To switch yarn, finish the last stitch of the old color by pulling the new color through the final two loops; more detail is in amigurumi color changes.
Body and head (make 1)
- Rnd 1: with the dress color, ch 3 from the second leg, sc 9 around the first leg, sc 3 along the chain, sc 9 around the second leg, sc 3 along the other side of the chain (24)
- Rnds 2-6: sc 24 (24)
- Rnd 7: (sc 2, dec) x 6 (18)
- Rnds 8-10: sc 18 (18)
- Rnd 11: (sc 1, dec) x 6 (12)
- Change to the skin tone on the last yarn over of Rnd 11 and cut the dress color. Stuff the body firmly, right up to the edge.
- Rnd 12: sc 12 (12)
- Rnd 13: inc x 12 (24)
- Rnd 14: (sc 3, inc) x 6 (30)
- Pack more stuffing into the neck before going on.
- Rnds 15-21: sc 30 (30)
- Rnd 22: (sc 3, dec) x 6 (24)
- Rnd 23: (sc 2, dec) x 6 (18)
- Fit the safety eyes (see the face section), then stuff the head firmly.
- Rnd 24: (sc 1, dec) x 6 (12)
- Rnd 25: dec x 6 (6)
- FO, thread the tail through the front loops of the last 6 stitches and pull the hole closed.
Keeping the Neck Firm
The neck is one round of 12 stitches between an 18-stitch chest and a 30-stitch head, and it carries the heaviest part of the doll. Three things in the pattern are designed to stop it from nodding:
- It is short. A single neck round gives the head nowhere to hinge.
- The head widens at once. Rnd 13 doubles the stitch count in one round, so the head has a flat underside that rests on the shoulders.
- It is stuffed twice. Fill the body to the brim before the neck round, then add more through the neck after Rnd 14, pressing it down with the blunt end of the hook.
If the head still wobbles after you finish, the neck is understuffed. A fix that needs no unraveling: run a ring of small stitches around the neck round with skin-tone yarn, pull it gently snug and knot it. Stuffing technique is covered in how to stuff amigurumi.
Arms and Hair Cap
Arms (make 2)
- Rnd 1: 6 sc in MR (6)
- Rnds 2-3: sc 6 (6)
- Change from the skin tone to the dress color on the last yarn over of Rnd 3 to make a sleeve.
- Rnds 4-9: sc 6 (6)
- Stuff the hand end lightly, flatten the top, FO and leave a long tail.
Hair cap (make 1, hair color)
- Rnd 1: 6 sc in MR (6)
- Rnd 2: inc x 6 (12)
- Rnd 3: (sc 1, inc) x 6 (18)
- Rnd 4: (sc 2, inc) x 6 (24)
- Rnd 5: (sc 3, inc) x 6 (30)
- Rnds 6-9: sc 30 (30)
- FO and leave a long tail for sewing.
The cap alone gives a neat short hairstyle. Strands, buns, braids and curls all build on it, and they are covered in the guide to amigurumi doll hair.
Assembly and a Simple Face
- Find the front. Stand the doll up. The front is the side where the two legs sit side by side with the gap between them centered.
- Eyes. Set them between Rnds 18 and 19 of the body-and-head piece, with 6 stitches between them, centered above the gap between the legs. Push safety eyes in before stuffing the head; embroider yarn eyes afterward.
- Arms. Sew the flattened tops to the sides of the body at Rnd 10, just under the neck.
- Hair cap. Pull the cap over the top of the head, tilt it toward the back so the front edge sits about three rounds above the eyes, pin and sew around the edge.
Two dot eyes are a complete face, which is all an amigurumi doll pattern for beginners needs. For more, add a short straight stitch for a mouth two rounds below the eyes. Cheeks and eyebrows are in the face embroidery guide.
Tip
If the eyes end up off-center, the round start has drifted. Count from the gap between the legs straight up, not from the stitch marker, and pin the eye positions before committing.
Frequently asked questions
Can the doll stand up on its own?
It is designed as a soft doll to be held or propped, not a free-standing figure. Narrow stuffed legs under a large head make any doll top-heavy. Stuffing the legs very firmly helps it lean steadily against something, and sitting it against a pillow is the reliable option.
How do I turn the body into trousers and a shirt instead of a dress?
Change color at different rounds. Work the legs in the trouser color from Rnd 3 onward, keep that color for the first three or four body rounds, then switch to a shirt color up to the neck. The stitch counts stay exactly the same.
There is a small hole between the legs where I joined them. How do I close it?
A gap at the chain is common. Use the yarn end from the first leg, or a new strand of the dress color, and sew two or three stitches across the gap from the outside. Pull the knot inside the body before stuffing it.