Amigurumi Doll Hair: Wig Caps, Strands, Curls and Braids
Three ways to add hair to a crocheted doll: a wig cap, rooted strands and chain curls, with a simple bun, braids, and notes on yarn, hairline and trimming.
Tutorial at a glance
Materials
- Hair-color yarn
- A finished doll head
- Crochet hook for rooting strands
- A book or piece of card for measuring strands
- Sharp scissors
- Pins
- Blunt yarn needle
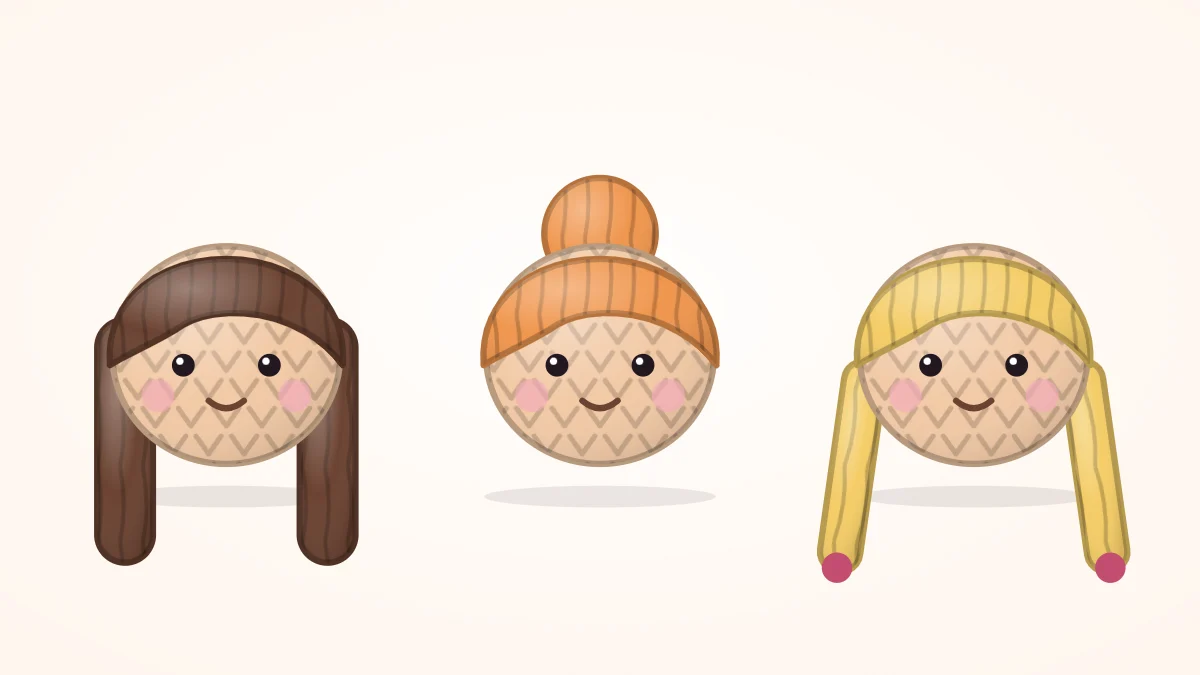
A bald doll head is a blank: the same face can become a toddler with two stubby braids, a dancer with a top bun or a character with waist-length waves, and the only thing that changes is the yarn on top. Amigurumi doll hair comes down to three building methods, a crocheted wig cap, strands rooted with a hook, and crocheted curls, and nearly every style is one of them or a combination. Pick the method first, then the style.
Choosing Yarn for Hair
Yarn for amigurumi doll hair does not have to match the yarn of the doll. What matters is how it hangs.
- Smooth cotton hangs straight, keeps a crisp parting and frays little when cut. Good for bobs, bangs and braids.
- Acrylic is lighter and slightly fluffy. The plies can be untwisted and brushed out for soft waves, but brushed hair cannot be made smooth again.
- Fuzzy or textured yarn hides the scalp well and suits short curly styles, though single strands are hard to root evenly.
Use the same weight as the head or one step thinner. Thick hair on a small head stands out stiffly instead of falling. For a wider look at fibers, see the guide to the best yarn for amigurumi.
Plan the Hairline and Parting First
Before attaching anything, mark the hairline with pins: across the forehead about three rounds above the eyes, down in front of where ears would be, and around the nape roughly level with the bottom of the eyes. Then run a line of pins for the parting, down the center or to one side. Every method below fills in the area inside that outline, and the pins keep both sides even.
Three Methods Compared
| Method | Best for | Trade-off |
|---|---|---|
| Wig cap alone | Short hair, a base under any style | Looks like a cap unless strands are added |
| Strands rooted in the head | Long loose hair with a natural scalp | Scalp shows unless hair matches the skin tone or is rooted densely |
| Strands rooted in a cap | Full hair with fewer strands; removable until sewn | Adds a little bulk to the head |
| Chain curls | Ringlets and curly bobs | Uses more yarn; curls are heavy |
Method 1: The Crocheted Wig Cap
A wig cap is the top half of the head worked in the hair color. The abbreviations used: MR magic ring, sc single crochet, inc increase (2 sc in the same stitch), Rnd round, FO fasten off, ch chain. Work in a continuous spiral from a magic ring, with a stitch marker in the first stitch of each round. This cap fits a head that is 30 stitches around at its widest, such as the one in the beginner doll pattern.
Wig cap (make 1)
- Rnd 1: 6 sc in MR (6)
- Rnd 2: inc x 6 (12)
- Rnd 3: (sc 1, inc) x 6 (18)
- Rnd 4: (sc 2, inc) x 6 (24)
- Rnd 5: (sc 3, inc) x 6 (30)
- Rnds 6-9: sc 30 (30)
- FO and leave a long tail for sewing.
For a different head, increase until the cap has the same stitch count as the widest round of the head, then work even rounds until it reaches the pinned hairline. Try it on as you go. Tilt the finished cap toward the back so it sits higher on the forehead than on the nape, and sew around the edge with small stitches.
Method 2: Rooted Strands
This is the latch-hook knot, made with an ordinary crochet hook.
- Wrap yarn around a book or a piece of card that is slightly taller than the hair length you want, and cut along one edge. Every strand is now the same length and twice as long as the finished hair.
- Slide the hook under one stitch of the head or cap.
- Fold a strand in half, catch the fold with the hook and pull it through to form a loop.
- Bring both tails through the loop and pull snug.
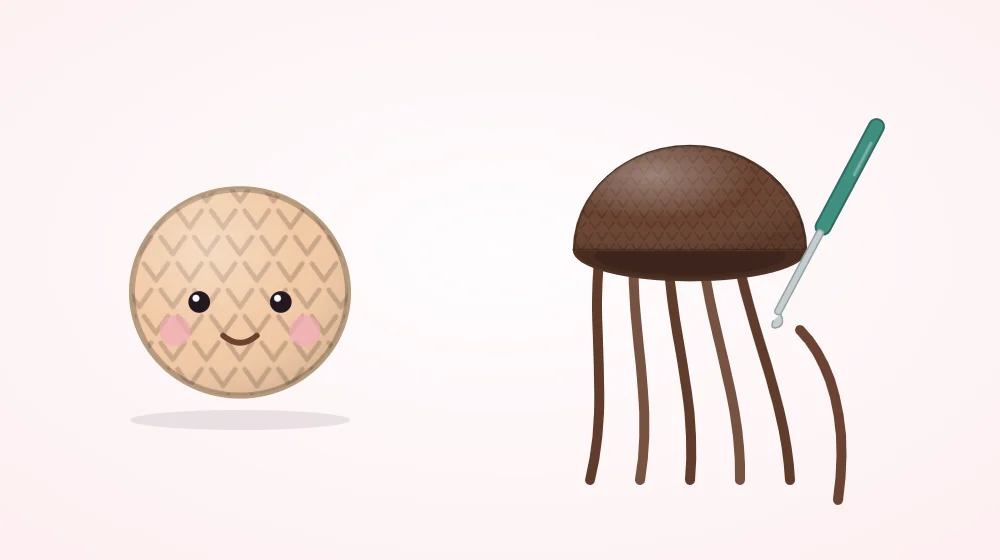
You do not need a strand in every stitch. Root a full row around the hairline and along both sides of the parting, where the scalp is visible, then fill in every second stitch on every second round. Check from above and add strands where the base shows through.
Rooting straight into the head gives the flattest result. A hair-colored cap hides thin spots, so fewer strands are needed.
Watch out
Knotted strands can be pulled out by a determined child, and long loose hair is not suitable for a toy meant for a baby or toddler. For young children, stop at the plain wig cap.
Method 3: Chain Curls
A chain with two stitches crowded into every link has too much fabric on one edge, so it twists into a corkscrew by itself.
- Curl: ch 21, then starting in the second ch from the hook, work 2 sc in each ch to the end (40)
- FO and leave a tail for sewing. Twist the curl with your fingers to set the spiral.
A longer chain gives a longer ringlet. Sew curls by their starting end around the hairline first, then fill toward the crown. To avoid cutting the yarn each time, work the curls straight onto a wig cap: join the yarn to a stitch on the cap edge, make one curl, slip stitch into the next cap stitch and repeat.
A Simple Bun and Braids
Top bun
Root long strands around the whole hairline only, leaving the crown empty. Gather them all upward, tie them at the top of the head with a strand of the same yarn, then twist the tail into a coil, wrap it around its own base and stitch it down. The strands sweep up from the edge and cover the scalp without any filling in.
Two braids
Root strands along a center parting from forehead to nape, plus the hairline. Divide the hair left and right, tack each side to the head with a few stitches at ear level so the parting stays put, then braid below the tack and tie the ends with a short strand.
Trimming
Cut last, and cut less than you think. Smooth the hair down with your fingers, hold the scissors level and trim a little at a time while turning the doll; hair that was cut too short can only be replaced, not lengthened. For bangs, comb a few front strands forward and trim them just above the eyes. Sewing the cap on uses the same stitches as any other piece, covered in the guide to sewing amigurumi pieces together.
Frequently asked questions
Should I add the hair before or after the face?
Add the face first. The eyes set the height of the hairline, and safety eyes have to go in before the head is closed anyway. With the face in place you can pin the hairline in proportion to it.
How do I stop yarn hair from fraying at the ends?
Some fraying is normal with plied yarn and reads as soft ends. Tightly twisted cotton frays least. If it bothers you, knot each strand close to its tip or tie groups of strands into braids or bunches so the ends are contained.
Can I change the hairstyle later?
Rooted strands can be unpicked one knot at a time with the tip of a needle, and a sewn-on wig cap can be removed by snipping its seam carefully. Brushed-out or trimmed hair cannot be reversed, so replace those strands with new ones.