Amigurumi Food: Strawberry, Donut and Fried Egg Patterns
Three short food patterns, a strawberry, a donut and a fried egg, with the basic shape behind each one and notes on carrots, mushrooms, pears, faces and play-food safety.
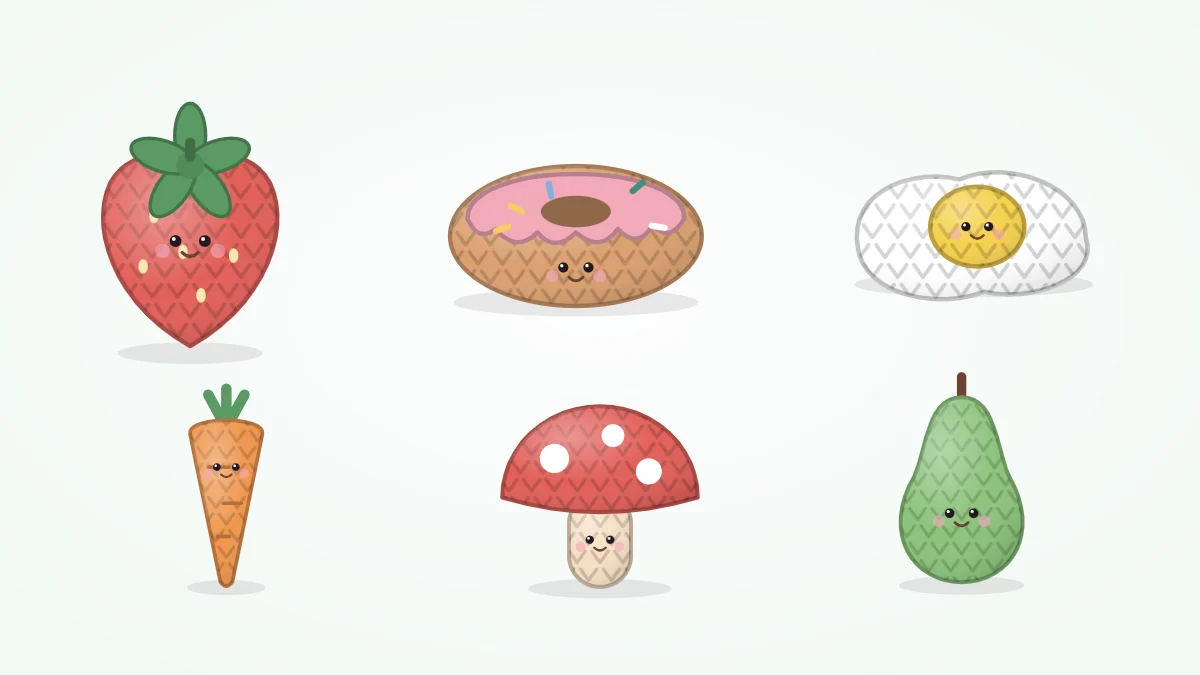
Tutorial at a glance
Materials
- Red and green yarn for the strawberry
- Tan and pink yarn for the donut
- White and yellow yarn for the fried egg
- Polyester fiberfill
- Locking stitch marker
- Blunt yarn needle
- Black yarn or thread for faces
A strawberry is a cone with a rounded top. A donut is a tube bent into a circle. A fried egg is a flat disc with a small dome on it. Amigurumi food shows clearly that every crocheted object is a basic shape with a detail added, and the pieces are small and need little assembly. Below are three original patterns and notes on three more foods.
Which Shape Makes Which Food
| Food | Base shape | Detail that sells it |
|---|---|---|
| Strawberry | Short cone closed with a rounded top | Green star cap, pale seed stitches |
| Donut | Tube joined into a ring | Wavy frosting, sprinkle stitches |
| Fried egg | Flat disc plus a small dome | Uneven white edge |
| Carrot | Long narrow cone | Green loops on top |
| Mushroom | Dome on a short tube | White spots on the cap |
| Pear | Large ball narrowing to a small one | Brown stem, one leaf |
Each of these shapes is explained on its own in the guide to basic amigurumi shapes.
Materials and Abbreviations
Use worsted weight (#4 medium) cotton or acrylic yarn and a 3.5 mm (US E-4) hook, with polyester fiberfill, a locking stitch marker and a blunt yarn needle. Small amounts of red, green, tan, pink, white and yellow cover all three patterns. At this gauge each food is about 2 to 3 in (5 to 7.5 cm) across, depending on yarn and tension.
- MR: magic ring
- ch: chain
- st(s): stitch(es)
- sc: single crochet
- inc: increase (2 sc in the same stitch)
- dec: invisible decrease (sc 2 stitches together through the front loops)
- sl st: slip stitch
- hdc: half double crochet
- dc: double crochet
- Rnd: round
- FO: fasten off
Work in a continuous spiral, right side out, with a stitch marker in the first stitch of each round. Most pieces start with a magic ring.
Strawberry
Berry (make 1, red)
The berry starts at the pointed tip.
- Rnd 1: 6 sc in MR (6)
- Rnd 2: (sc 1, inc) x 3 (9)
- Rnd 3: (sc 2, inc) x 3 (12)
- Rnd 4: (sc 1, inc) x 6 (18)
- Rnds 5-7: sc 18 (18)
- Rnd 8: (sc 1, dec) x 6 (12)
- Stuff firmly.
- Rnd 9: dec x 6 (6)
- FO, thread the tail through the front loops of the last 6 stitches and pull the hole closed.
Leaf cap (make 1, green)
- Rnd 1: 5 sc in MR (5)
- Rnd 2: (ch 4, sl st in the second ch from the hook, sc in the next ch, hdc in the last ch, sl st in the next st of the ring) x 5, making 5 points
- FO and leave a long tail. Sew the cap over the closed top of the berry, tacking down each point.
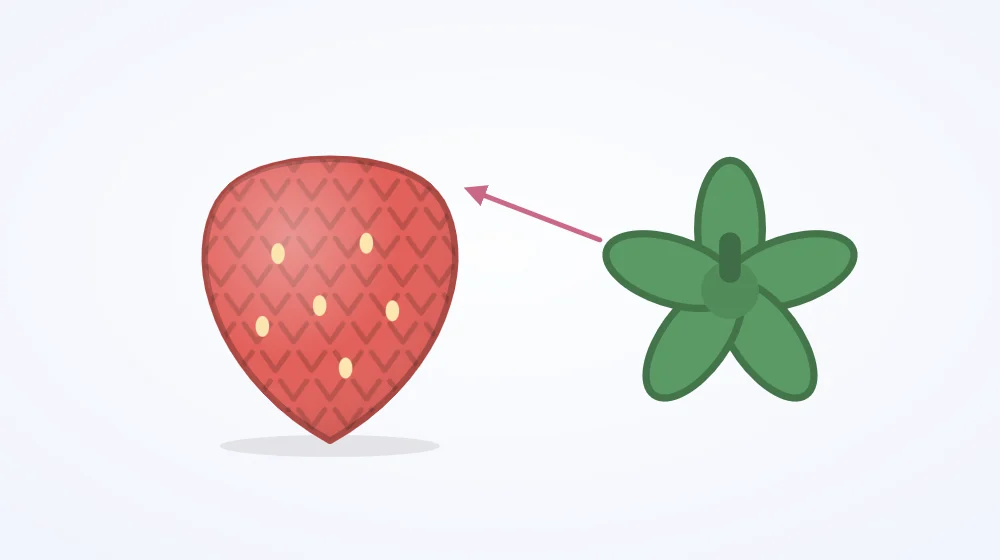
For seeds, make scattered single stitches in pale yellow, each one stitch tall.
Donut
Ring (make 1, tan)
- Rnd 1: ch 12, sl st in the first ch to form a loop without twisting it, then sc in each ch (12)
- Rnds 2-24: sc 12 (12)
- Stuff the tube as it grows, firmly but without stretching it. FO with a long tail, bend the tube into a ring and sew the two open ends together stitch for stitch.
Frosting (make 1, pink)
- Rnd 1: ch 12, sl st in the first ch to form a loop, then sc in each ch (12)
- Rnd 2: (sc 1, inc) x 6 (18)
- Rnd 3: (sc 2, inc) x 6 (24)
- Rnd 4: (sl st in the next st, 3 hdc in the next st, sl st in the next st) x 8, making 8 waves (40)
- FO and leave a long tail.
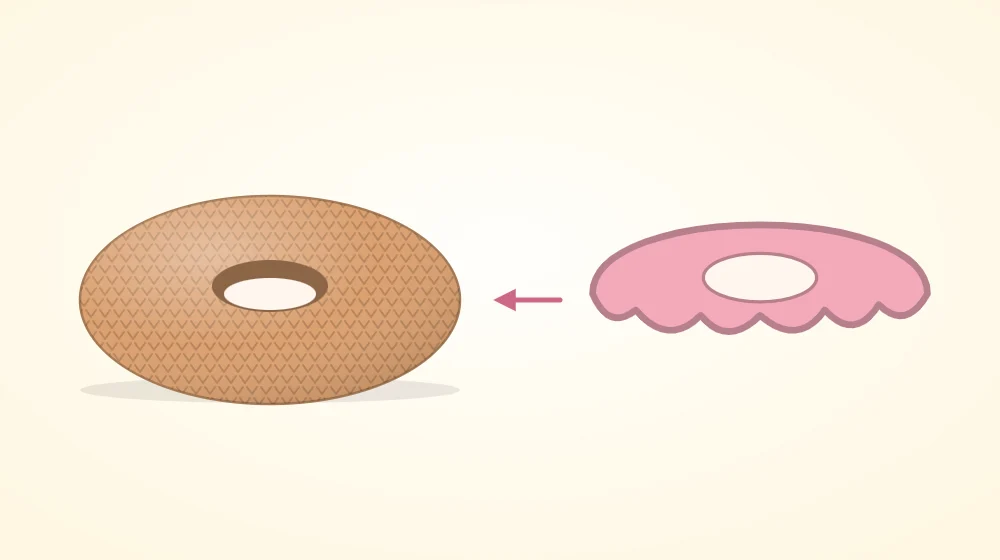
Lay the frosting on the ring with the holes lined up and the join of the tube hidden underneath it. Sew the inner edge first, then the waves. Short straight stitches in mixed colors make sprinkles.
Fried Egg
Egg white (make 1, white)
- Rnd 1: 6 sc in MR (6)
- Rnd 2: inc x 6 (12)
- Rnd 3: (sc 1, inc) x 6 (18)
- Rnd 4: (sc 2, inc) x 6 (24)
- Rnd 5: (sc 3, inc) x 6 (30)
- Rnd 6: (sc in the next 2 sts, hdc in the next st, 3 dc in the next st, hdc in the next st) x 6 (42)
- Sl st in the next st, FO and weave in the end. The white stays flat and unstuffed.
Yolk (make 1, yellow)
- Rnd 1: 6 sc in MR (6)
- Rnd 2: inc x 6 (12)
- Rnds 3-4: sc 12 (12)
- FO and leave a long tail. Add a pinch of stuffing and sew the open edge to the white, slightly off-center.
The taller stitches in the last round of the white create six soft bulges, which is what stops it from looking like a coaster.
Carrot, Mushroom and Pear
- Carrot: a cone that grows slowly. Start with 6 stitches and add only two or three increases every second round until it is about 15 stitches around, then close the top quickly. Knot a few green chain loops into the center.
- Mushroom: a wide dome for the cap, a short tube for the stem. Work one round of the cap’s underside in the back loops only so it folds sharply inward, and sew the stem into the opening.
- Pear: begin like a basic amigurumi ball, but after the widest rounds decrease by half, work a few even rounds for the neck, then close. Stuff the lower half more firmly than the top.
Adding Faces
A face turns amigurumi food into a character. Keep it small and low: two eyes about a third of the way up, set wide, with a tiny mouth between them. Stitch the face before closing a stuffed piece when you can, so the knots stay inside. Stitch options are in the guide to amigurumi face embroidery.
Watch out
Play food ends up in mouths. Safety eyes, beads and buttons are a choking hazard for babies and children under 3, so embroider every feature, sew caps and frosting down all the way around, and skip any food small enough to be swallowed whole.
Play Food That Lasts
- Crochet tightly. Gaps let stuffing work its way out when a toy is squeezed over and over.
- Knot every yarn tail before burying it inside the piece.
- Tug each sewn part after finishing; anything that shifts needs another pass of stitches.
Frequently asked questions
Which amigurumi food should I make first?
The fried egg. The white is a flat circle with one decorative round and the yolk is four rounds, so there are no decreases and almost no stuffing. The strawberry is the natural second project because it adds decreasing and closing.
My donut has a visible seam where the tube ends meet. How do I hide it?
Turn the seam so it sits under the frosting, which is wide enough to cover it. Sewing the ends together through matching stitches, one to one, also keeps the join from twisting. Any small ridge that remains can go on the underside.
Why does my flat egg white curl up like a bowl?
A circle cups when it has too few stitches for its size, usually from a missed increase or very tight tension. Count each round against the number in parentheses. If the counts are right, pull the piece gently flat with your fingers or go up half a hook size.